Installation & Registration
DbSchema runs on Windows, macOS, and Linux. This guide walks you through downloading, installing, and activating your license.
Download
Download the latest version of DbSchema from the official download page.
Installers are available for:
- Windows —
.exeinstaller - macOS —
.dmgdisk image - Linux —
.shshell installer or.deb/.rpmpackages - All platforms —
.jararchive (requires Java 11+)
Install
Windows
- Run the downloaded
.exeinstaller. - Follow the on-screen prompts and choose your installation directory.
- Launch DbSchema from the Start Menu or desktop shortcut.
macOS
- Open the
.dmgfile and drag DbSchema into your Applications folder. - On first launch, macOS may ask you to confirm opening an app from the internet — click Open.
Linux
- Make the installer executable:
chmod +x DbSchema_unix_*.sh - Run it:
./DbSchema_unix_*.sh - Follow the on-screen prompts.
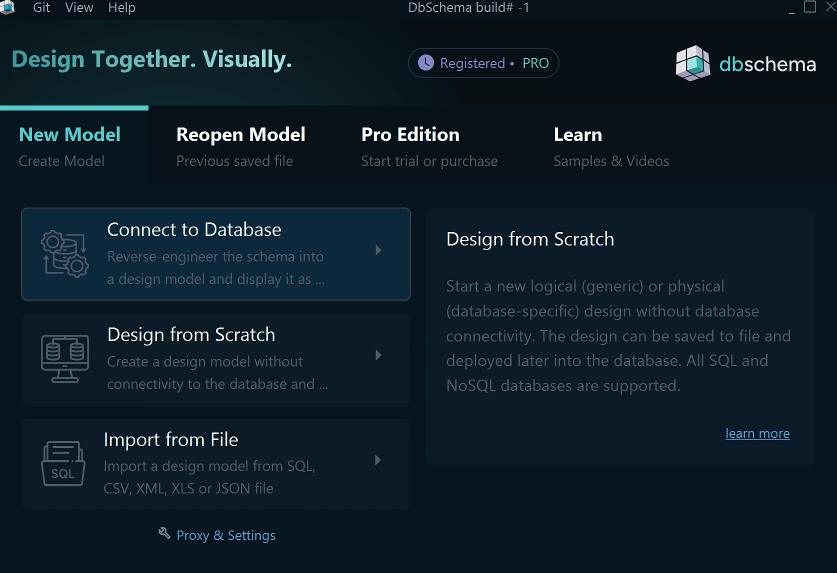
First Launch — Welcome Screen
On first launch DbSchema opens the Welcome Screen. From here you can connect to a database, open an existing model file, or start a new design from scratch.
Register / Activate License
To activate a paid license, open the registration dialog from Help → Register License in the menu. Enter your email address and the license key you received after purchase.
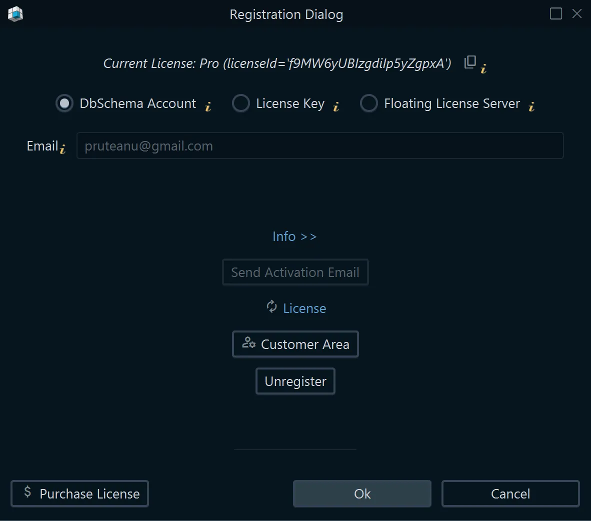
DbSchema requires an internet connection to validate the license on first activation. After activation, you can work offline — the license is stored locally.
To manage your license, invoices, or subscription, visit the Support Page.
Free Trial
DbSchema includes a 15-day free trial of all PRO features. No credit card is required. All features are fully available during the trial, including schema synchronization, Git integration, data generator, and logical design.
After the trial expires, DbSchema reverts to the free Community edition, which supports read-only access to diagrams and basic data browsing. See the edition comparison for details.
Software Updates
DbSchema checks for updates automatically on startup. You can also check manually from Help → Check for Updates.
Update behaviour can be configured in Settings → Software Updates — you can choose to be notified only for major releases, or disable automatic checks entirely.
Installation complete? Open DbSchema and follow the Quick Tutorial to get started.