Connect to Databases
DbSchema supports 70+ SQL and NoSQL databases via JDBC (Java Database Connectivity).
When you create a connection, DbSchema automatically downloads the required JDBC driver.
If downloads are blocked in your environment, click Upload JDBC driver to add the driver .jar file manually.
Looking for your database engine? See the full list →
Choose Your Database
When starting a new project and selecting Connect to Database, DbSchema first asks you to choose your database type.
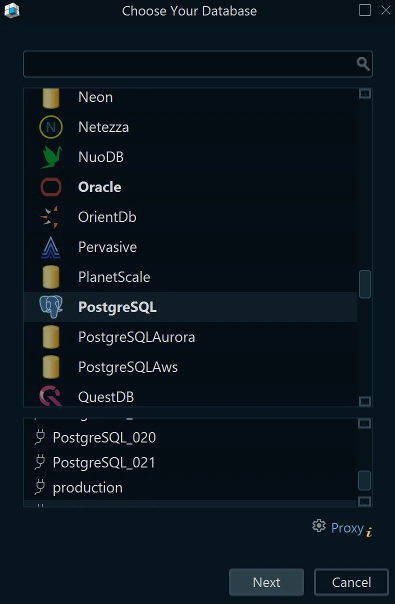
Select your database from the list. DbSchema will open the Connection Dialog pre-configured for that database type.
Connection Dialog
Use the Connection Dialog to configure every aspect of your database connection.
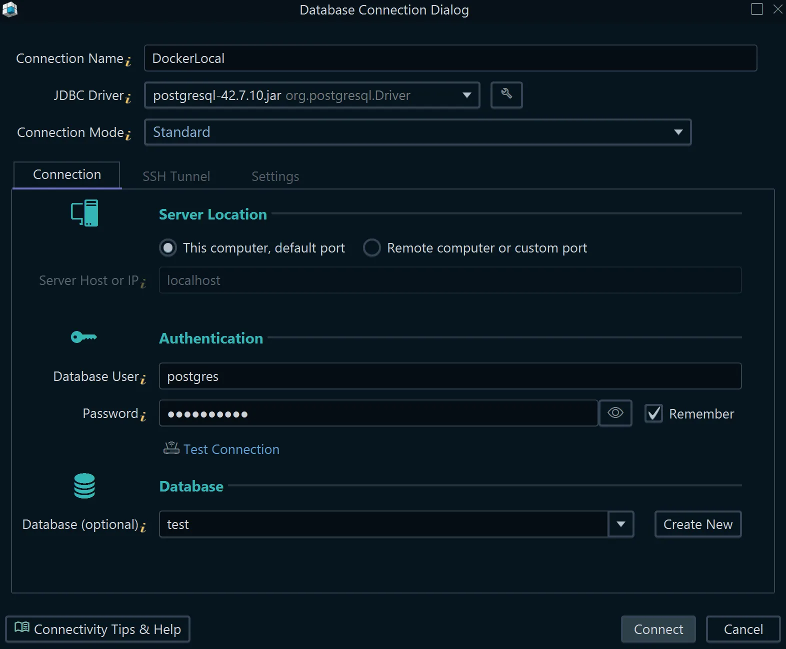
Fill in the following fields:
-
Connection Name (Alias) — Give the connection a clear name (e.g.,
Prod-Postgres) to identify it in the Connection Manager. -
JDBC Driver — DbSchema automatically downloads the required driver from its public Maven repository. If downloads are blocked, click Upload JDBC driver and supply the
.jarfile manually. See the JDBC Driver Manager for details. -
JDBC URL / Connection Mode — Two modes are available:
- Standard template — DbSchema builds the URL from the Host, Port, and Database you enter.
- Edit manually — Paste a full JDBC connection string directly (common with cloud providers).
-
Server Location — Choose between:
- This computer, default port — for a local instance.
- Remote computer or custom port — enter the Host and Port explicitly.
-
Test Connection — Click Check (Ping) to verify the server is reachable before proceeding.
-
Credentials — Enter the database User and Password, then select the target Database.
-
Optional tabs — Configure SSL/TLS, SSH Tunnel, or Proxy as needed.
-
Click Connect to establish the connection. The connection is saved for future reuse.
Connection Manager
The Connection Manager shows all saved connections. Open it from Connections → Connection Manager.
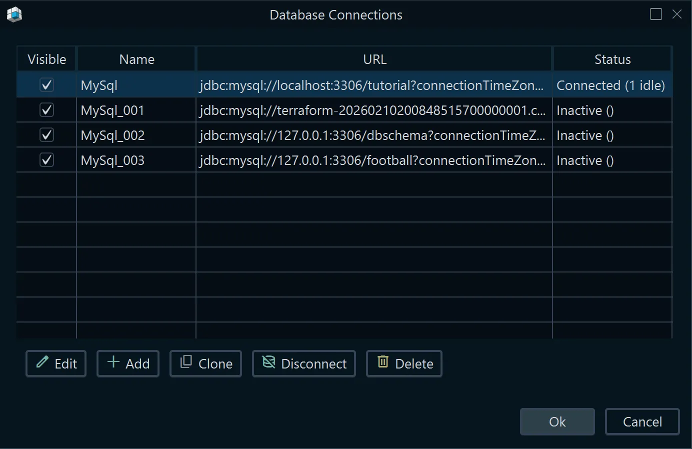
From here you can create new connections, edit existing ones, duplicate them, or delete them. Double-click a connection to open it.
SSH Tunnel
To connect to a database through an SSH tunnel, open the SSH Tunnel tab in the Connection Dialog and fill in:
- SSH Host — hostname or IP of the SSH server.
- SSH Port — default is 22.
- SSH User — the username configured on the SSH server.
- Authentication — choose Password or Private Key (OpenSSH format).
The SSH tunnel encrypts the communication between DbSchema and the database server, which is useful when the database port is not exposed directly to the internet. Set the database host and port fields to the address as seen from the SSH host (often localhost if the database runs on the same machine as the SSH server).
Testing Connectivity
Before connecting, you can verify the server is reachable from your machine using standard command-line tools:
- ping — checks basic network reachability:
ping dbserver.mycompany.com - telnet — tests whether the database port is open:
telnet dbserver.mycompany.com 5432 - openssl — tests SSL-enabled ports:
openssl s_client -connect dbserver.mycompany.com:5432
If the port is unreachable, check the firewall rules on the database server. See the Firewall guide for instructions.
Connection Options
The Options tab provides additional settings for the connection:
- Save model to local file — saves the connection data separately to a local file (by default DbSchema saves all models in its internal store).
- Read-Only Connection — blocks all schema modifications and data edits through DbSchema.
- Timezone — set a specific timezone to avoid errors when your computer and database use different timezones.
- Highlight Connection — assign a color to this connection (e.g., red for Production, green for Development).
- Schema Alias — show the schema under a different name on your local machine.