Connect to Databases
DbSchema works with 70+ SQL and NoSQL databases via JDBC.
When you create a connection, DbSchema automatically downloads the required
JDBC driver. If downloads are
blocked in your environment, click Upload JDBC driver to add
the driver file (.jar) manually.
Looking for your engine? See the full list of supported databases →

Table of Contents
Connection Dialog
Use this dialog to set up a connection to any supported database.
Create a Connection (composed URL)

- Give the connection a clear Connection Name (e.g., “Prod-Postgres”).
-
DbSchema automatically picks and downloads the required
JDBC driver from its public Maven repository. If downloads are blocked,
click Upload JDBC driver and add the driver file (
.jar) manually. -
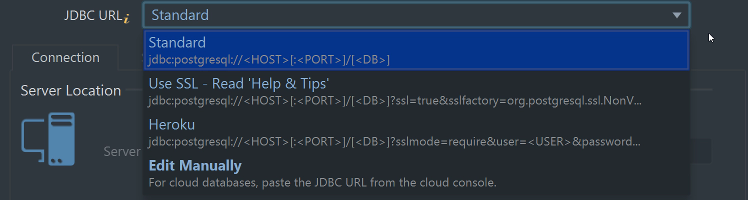
Set the JDBC URL.
- Standard template - DbSchema builds the URL from the Host, Port, and Database you enter.
- Edit manually - paste a full connection string (common with cloud providers).
-
Choose Server Location:
- This computer, default port - local instance.
- Remote computer or custom port - enter Host and Port.
- Click Check (Ping) to verify the server is reachable.
- Enter Authentication details (Database User and Password), then choose your Database (e.g., postgres).
- (Optional) Configure any required tabs: SSL/TLS, SSH Tunnel, or Proxy.
- Click Connect to establish the connection. (You can save this connection for reuse.)
How to Find the Hostname of the Database Server
Windows
You can find the hostname on a Windows server using several methods:
1. Using Command Prompt
- Press Win + R, type
cmd, and press Enter. - Type the command:
hostname - The output will display the hostname of the system.
2. Using ipconfig
- Open Command Prompt as above.
- Type:
ipconfig /all - Look for the line labeled Host Name in the output.
3. Using nslookup
- Open Command Prompt.
- Type:
nslookup <IP address> - Replace
<IP address>with the server's IP. If a reverse DNS entry exists, this will return the hostname.
4. Using nbtstat
- Open Command Prompt.
- Type:
nbtstat -A <IP address> - Replace
<IP address>with the actual IP. This displays the NetBIOS name table, which includes the hostname.
Linux
Use the terminal to retrieve the hostname:
- Open a terminal application (e.g., Applications > Accessories > Terminal).
- Type one of the following commands:
hostnamecat /proc/sys/kernel/hostname
- Press Enter.
- The system's hostname will be displayed.
macOS
You can find the hostname of your Mac in the System Preferences:
- Go to Apple Menu > System Preferences > Sharing.
- The computer name (hostname) will be shown at the top of the window.
If you still can't determine the hostname or have trouble connecting, please contact your system administrator or network support team.
How to Find the IP Address of the Database Server
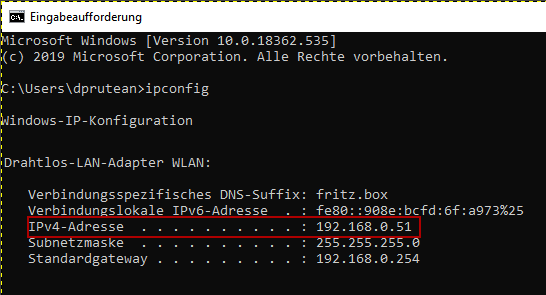
On Windows
- Open the Start Menu and type cmd, then press Enter to launch the Command Prompt.
- In the Command Prompt, type:
ipconfig - Look for the line labeled IPv4 Address under the active network adapter. This is the server's IP address.
On Linux
- Open a terminal (e.g., Applications > Accessories > Terminal).
- Type one of the following commands:
ip addr show— recommended for newer systemsifconfig -a— for older systems (requiresnet-tools)
- Press Enter.
- Look for the IP address next to
inetunder the active interface (e.g.,eth0,wlan0).
On macOS
- Go to Apple Menu > System Preferences > Network.
- Select the active network interface on the left (with the green dot).
- Your IP address will appear below the connection status.
Note: If your server is behind a router, firewall, or VPN, the displayed address may be an
internal IP (e.g., 192.168.x.x).
To find the external IP address, open a browser on the server and visit whatismyipaddress.com.
How to Test the Hostname or IP Address of the Database Server
Before connecting DbSchema to a remote database server, it's useful to test whether the server is reachable from your machine. Here are three methods to verify connectivity: using ping, telnet, or openssl.
openssl or telnet on Windows, you can install the
Git client and use Git Bash, or install telnet from Windows
Features.
1. Using Ping
This checks basic network reachability.
ping <hostname or IP>Example:
ping dbserver.mycompany.com
ping 192.168.1.25- If the server replies, it means the host is reachable.
- If you receive "Request timed out", the server may be offline, behind a firewall, or blocking ICMP requests.
2. Using Telnet
This tests if a specific port (e.g., the database port) is open and accepting connections.
telnet <hostname or IP> <port>Example:
telnet dbserver.mycompany.com 5432   # PostgreSQL
telnet 192.168.1.25 3306 # MySQL- If the screen clears or shows a connection message, the port is open.
- If it says "Could not open connection", the port may be closed or blocked by a firewall.
3. Using OpenSSL (Requires Git Bash or OpenSSL Installed)
Useful for testing encrypted ports such as MySQL over SSL, PostgreSQL with SSL, etc.
openssl s_client -connect <hostname or IP>:<port>Example:
openssl s_client -connect dbserver.mycompany.com:5432- If you see a certificate chain or SSL handshake, the server is reachable and supports SSL on that port.
- If it hangs or shows a connection error, the server might not be listening on that port or SSL is not enabled.
These tools help verify if the database server is reachable and listening on the correct port. If you're still unable to connect, check firewalls, database server status, and network settings.
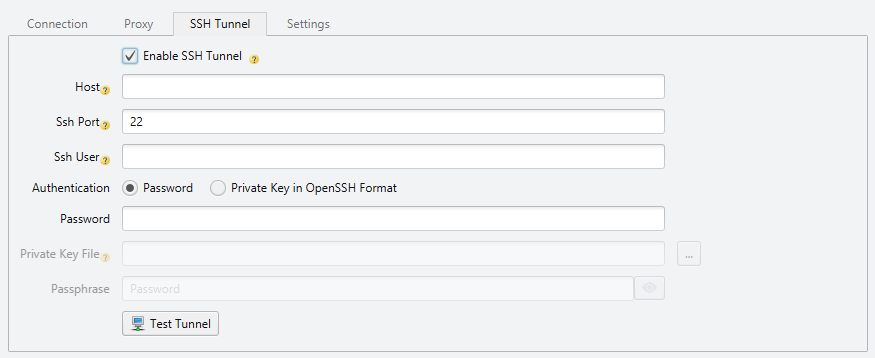
Establish an SSH Connection
Establish an SSH Tunnel to encrypt the communication to the database.
- Enter the Host where the SSH Server is activated;
- Enter the SSH Port where the server is activated. The default port is 22;
- Enter the SSH User configured in the SSH Tunnel;
- Select the Authentication method. This can be a password or an encrypted private key in Open SSH format.
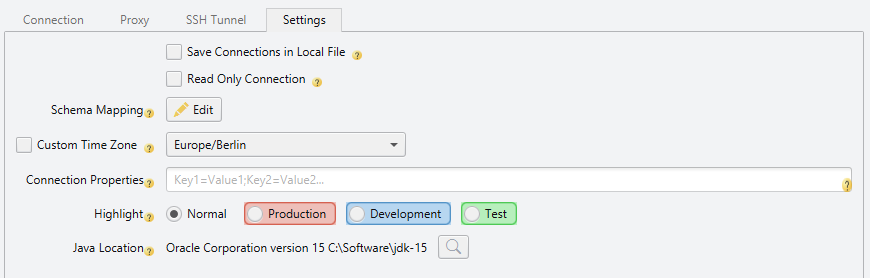
More options
In the Options section you can modify details about your model.
- Save your model to a local file. By default, DbSchema saves all models to model files. Enabling this feature will allow you to save the connection data separately, to a local file.
- Read-Only Connection won't allow any modifications in the database. You can add exceptions to this rule.
- Set a specific timezone for DbSchema so you can avoid timezone errors when your computer and the database use different timezones.
- Highlight Connection Combo allows you to give different colors for different types of connections (eg. Production, Testing, Development).
- You can set a different Alias for the schema on your computer.
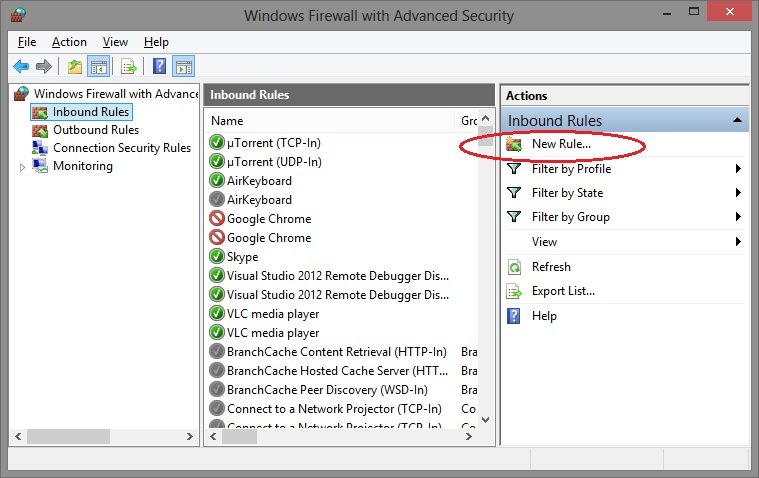
Enable Windows Firewall
Windows Firewall is blocking connectivity from other machines. To allow connectivity you have to create a new Inbound rule for the database port. Go to Control Panel > System and Security > Windows Defender Firewall > Advanced Settings > Inbound Rules and follow the “New Rule” wizard.