Improve Your Snowflake Database Design and Management with DbSchema
For data engineers on Snowflake who want the warehouse schema on a diagram, documented for people with no Snowflake login, and comparable with the model on their disk.
On this page
A Snowflake schema comes back with its tables in place and nothing drawn between them, because Snowflake records a foreign key on a standard table without enforcing it. DbSchema reads those declarations and draws them as lines, lets you draw the ones nobody declared, and exports the result as HTML5 documentation a colleague with no Snowflake login can open.
Connect DbSchema to a Snowflake account
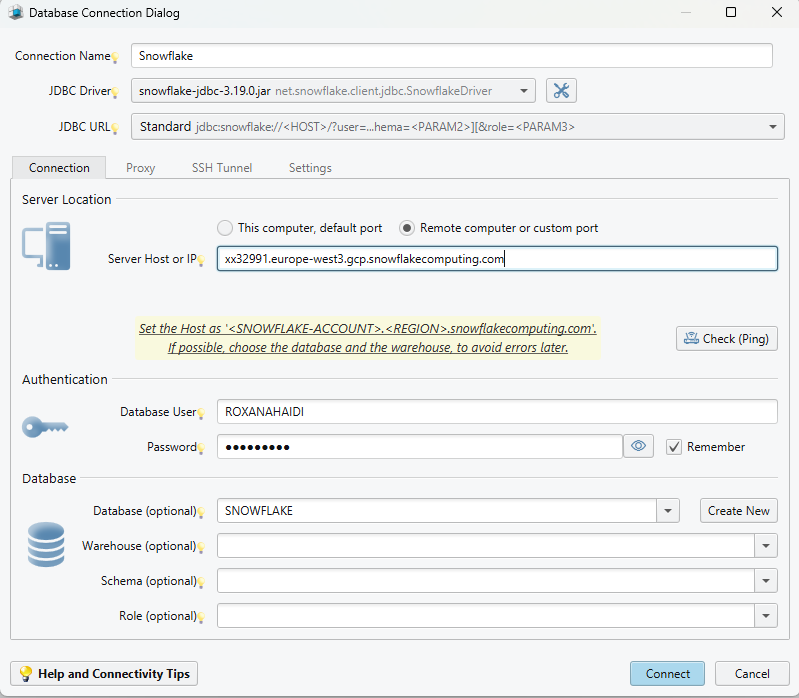
Snowflake has no port to open and no server to configure. The connection turns on the host, which is always your account identifier followed by .snowflakecomputing.com. The current form of that identifier is myorganization-myaccount; older accounts use an account locator with the region and the cloud, such as xy12345.eu-central-1. Take whichever your account shows rather than assembling one by hand. The JDBC URL DbSchema builds from it looks like this:
jdbc:snowflake://HOST/?user=USER&db=DB&warehouse=WAREHOUSE&schema=SCHEMA
Name a warehouse. Storage and compute are separate in Snowflake, and a warehouse is required for queries as well as all DML operations, loading data into tables included. Give the role too when your user has more than one, because a role with no USAGE privilege on the warehouse you named returns an empty schema instead of an error.
The Method list carries five authentication entries. Password is the default. External Browser opens your identity provider's page and is the entry for Okta or any SAML single sign-on. Private Key File covers key-pair authentication, and OAuth and passcode entries sit beside them. DbSchema downloads net.snowflake.client.jdbc.SnowflakeDriver itself, so the driver is not something you fetch first. Click Connect and DbSchema reverse-engineers the databases and schemas you selected into the model; the Snowflake page goes through the setup field by field.
The diagram, and the relations Snowflake does not enforce
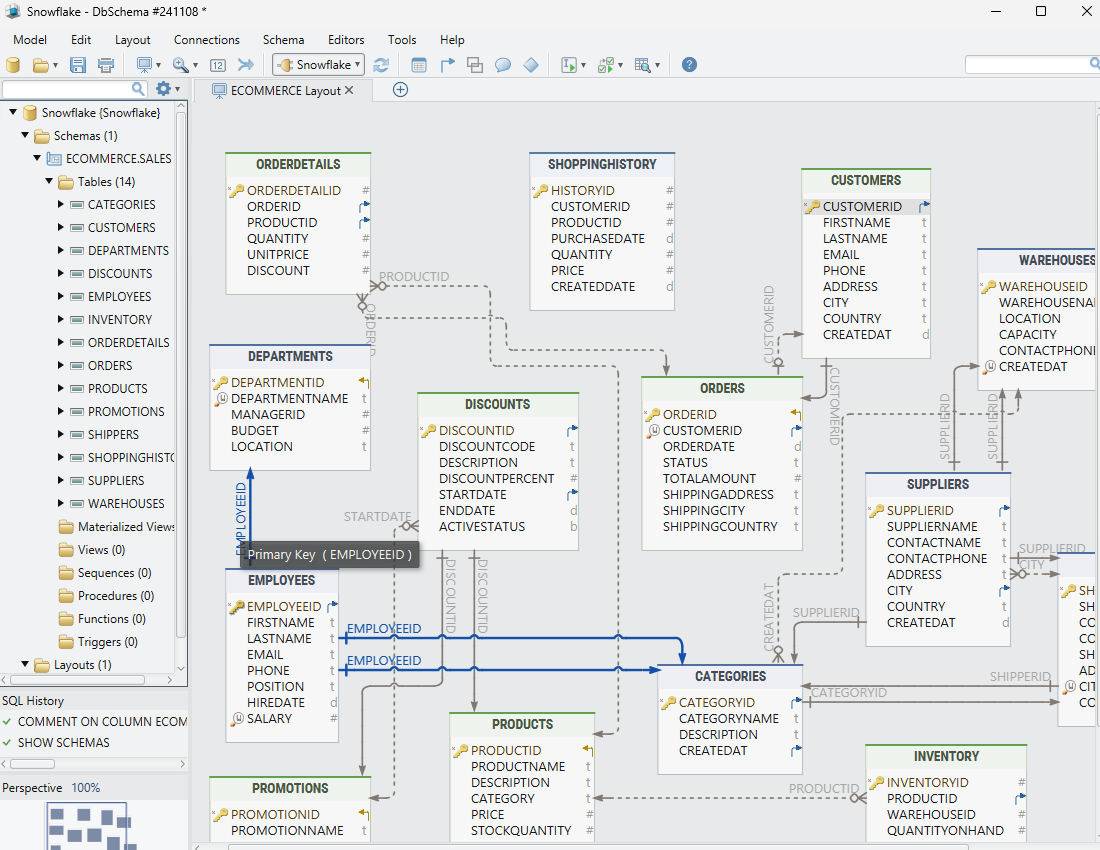
Declare a foreign key on a Snowflake standard table and the declaration is recorded:
CREATE TABLE customers (
  customer_id NUMBER PRIMARY KEY,
  name        VARCHAR NOT NULL
);

CREATE TABLE orders (
  order_id    NUMBER PRIMARY KEY,
  customer_id NUMBER REFERENCES customers(customer_id),
  total       NUMBER(12,2)
);
On a standard table Snowflake treats PRIMARY KEY, FOREIGN KEY and UNIQUE as optional and not enforced, and NOT NULL as the one constraint it does enforce. Hybrid tables are the exception, and only for the primary key. Snowflake requires a PRIMARY KEY on a hybrid table. A FOREIGN KEY or a UNIQUE constraint stays optional there, and Snowflake enforces it once you declare it. Both tables above are standard tables, so the reference from orders to customers is a statement of intent that Snowflake keeps and never checks.
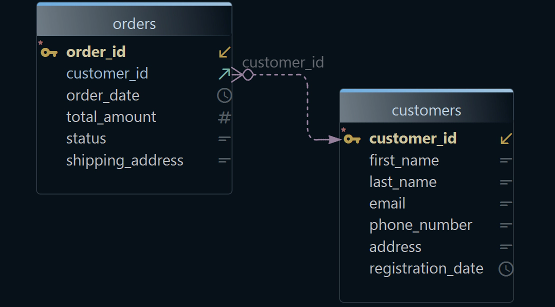
Kept metadata is still metadata DbSchema can read. Reverse engineering puts both tables on a diagram and draws the reference as a line between them, with crow-foot symbols for the cardinality, so the declared shape of the warehouse is on screen. Double-click a table header to open the Table Dialog and edit its columns, indexes and foreign keys from there.
Where nobody wrote the declaration in the first place, drag a column in the child table onto the matching column in the parent. DbSchema adds a virtual foreign key: a line on the canvas, saved in the design model file, that sends no statement to Snowflake. Every part of DbSchema that follows a foreign key follows a virtual one the same way.
Interactive HTML5 documentation of the Snowflake schema
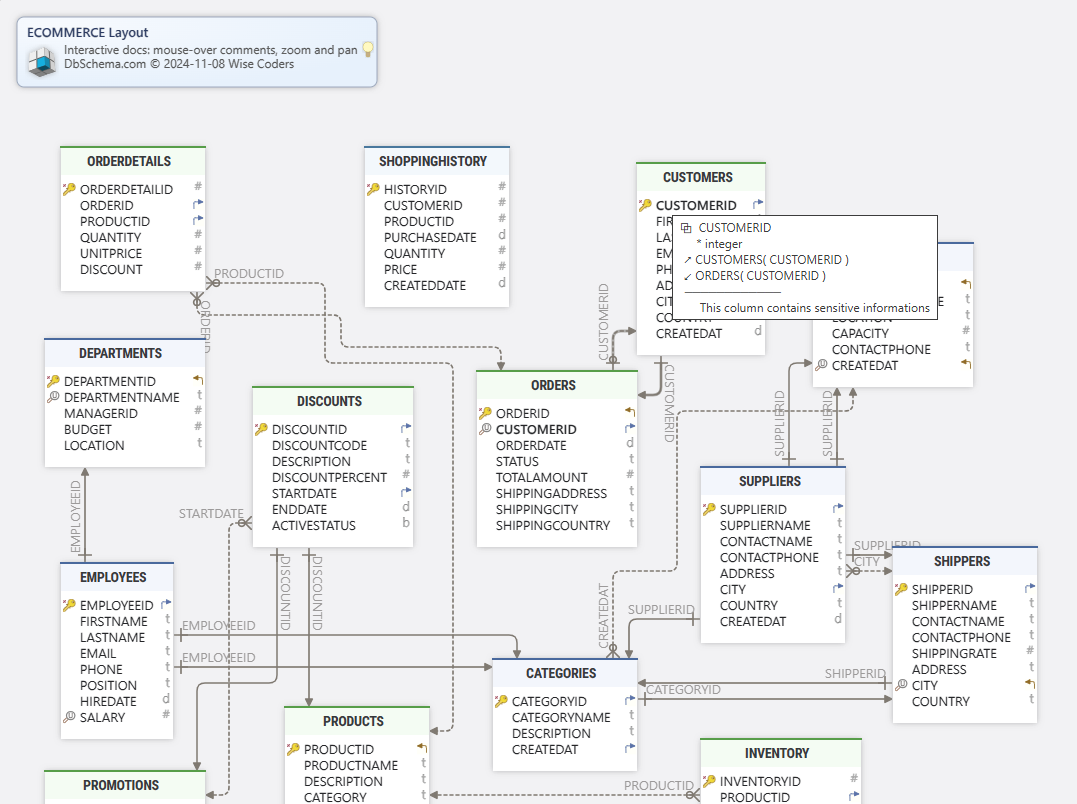
Diagram → Export HTML5 or PDF Documentation opens the documentation dialog. Choose the format, choose which diagrams go in, and choose which schema elements travel with them: columns, foreign keys, indexes, comments. The HTML5 output opens in any browser with no server behind it, and carries the diagram as a vector image, a searchable table list, and the full column detail underneath.
Snowflake lets you attach a comment to a table, and to individual table columns:
COMMENT ON COLUMN orders.total IS 'Order total in the account currency';
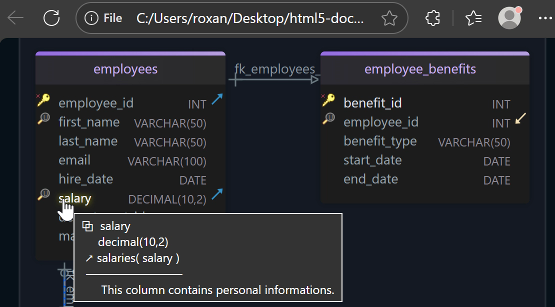
DbSchema keeps the same information in the Description field of a table or a column, and what you type there becomes content in every documentation format. In the HTML5 output it is also the mouse-over tooltip on the table or column name, which is what makes the export readable by someone who has never seen the warehouse. Markdown and PDF come out of the same dialog, Markdown to commit next to the code and PDF for a reviewer who will print it. The documentation export is in the Pro edition, and it also runs headless from a Groovy script through Automation Scripts, so a nightly build can regenerate it.
Querying Snowflake without writing the SQL first
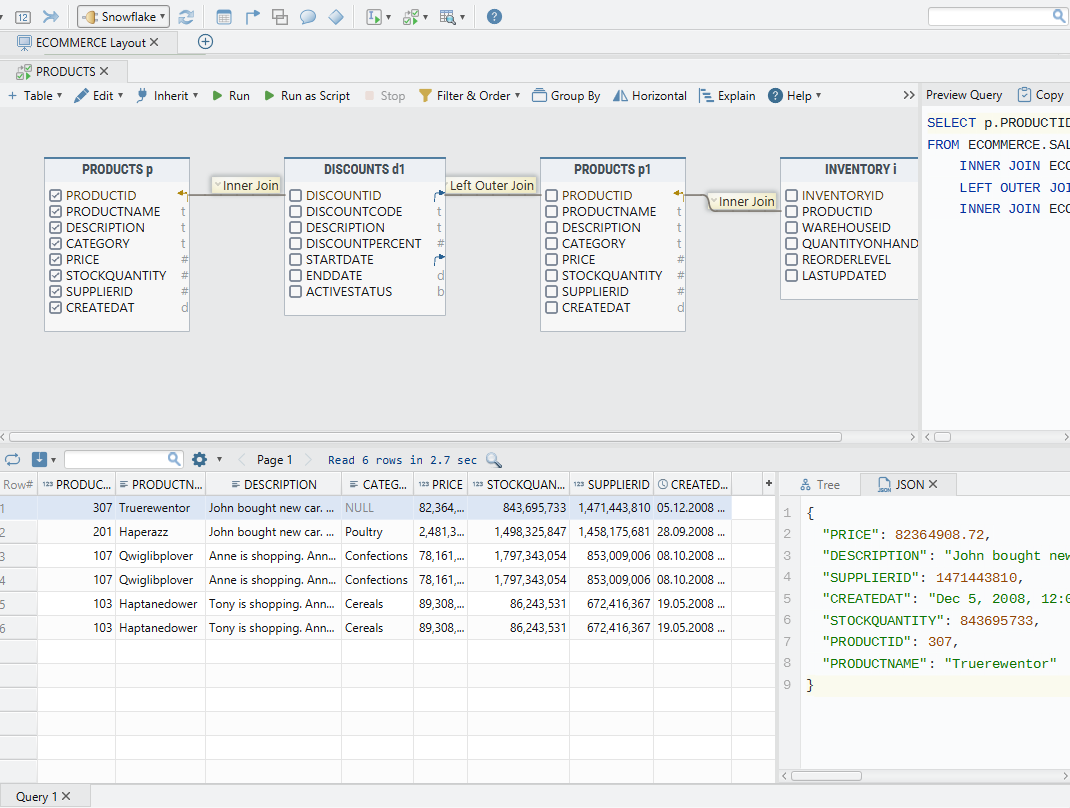
Click a table header on the diagram and the Query Builder opens with that table loaded. Tick the columns you want in the SELECT list. Click the small arrow next to a column to follow a foreign key, declared or virtual, and the related table joins the query; click the join label on the connecting line to switch between INNER JOIN, LEFT JOIN and EXISTS. Right-click a column and choose Filter for a WHERE condition, or switch on Group By and choose Aggregate for MIN, MAX, SUM, AVG or COUNT. The generated SQL is at the bottom of the builder and updates as you click.
When you would rather type, the SQL Editor runs SQL against the Snowflake connection directly. Ctrl+Space opens auto-complete over the connected schema. Execute Query runs the statement at the cursor and shows the result as a table; Run Script runs the whole editor content as plain text output. Save in the result pane re-executes the query and writes the complete result set to disk, which is the way to get a result too large for the screen. The Query Builder is in the Pro edition; the SQL editor is in the free Community Edition.
Related Snowflake rows side by side, and test data to fill them
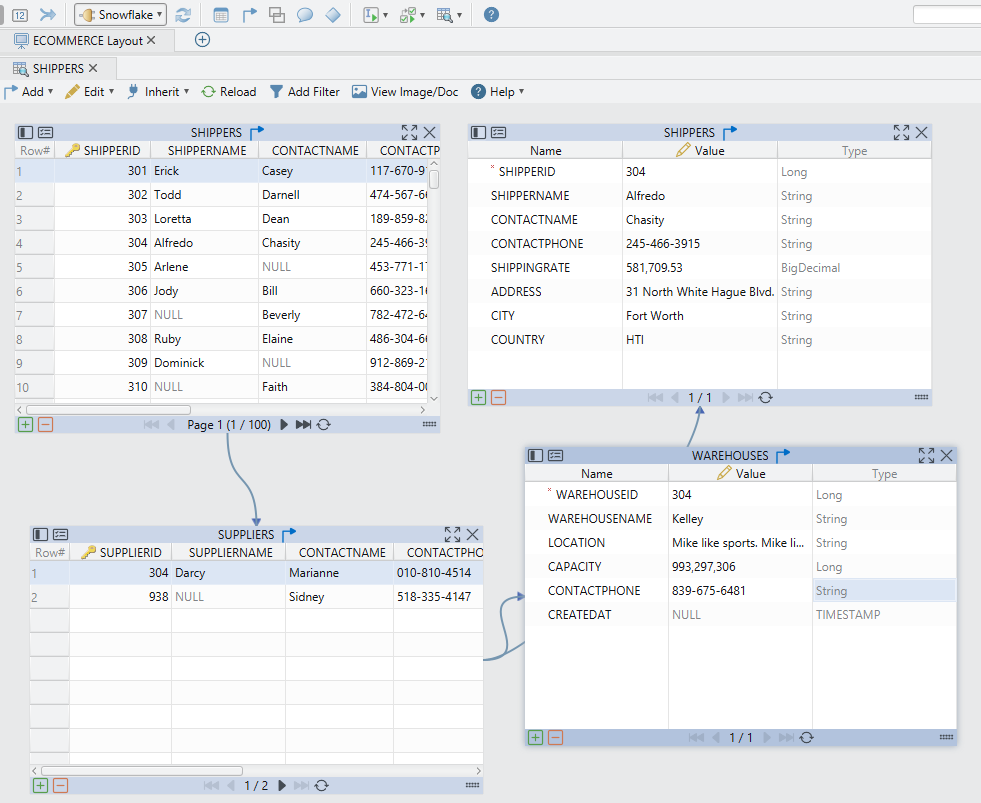
The Relational Data Editor opens several Snowflake tables at once, one pane per table, linked by their foreign keys. Select a row in the parent pane and every child pane refilters to the rows that match it, cascading as many levels deep as the schema goes. Open it from Editors → New Relational Data Editor, or right-click a table header on the diagram and choose Open in Relational Data Editor. Click a column header in any pane to filter that column. Insert, Edit and Delete sit in the table footer, and nothing reaches Snowflake until you press Commit; Rollback throws the pending changes away. Virtual foreign keys drive this the same as declared ones, which is what makes it usable on a warehouse where nothing forces the declaration to exist.
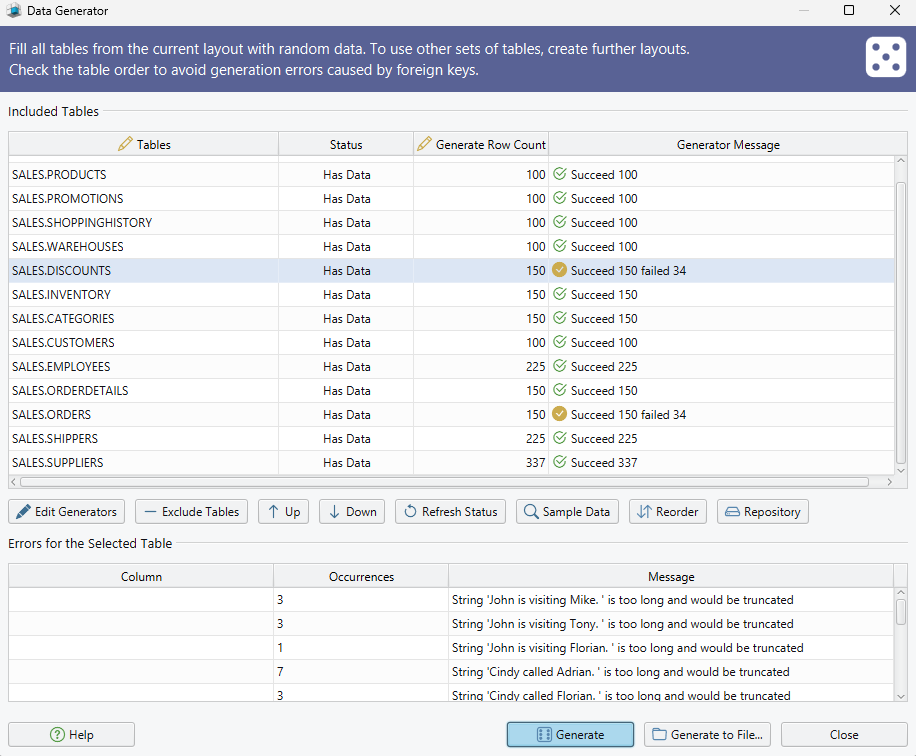
A schema with no rows in it is hard to review. Data Tools → Generate Random Data opens the Data Generator over the tables on your diagram. Set the number of rows per table, reorder the tables so a parent is populated before the table that references it, and double-click a table to check the pattern DbSchema picked for each column against what the column actually holds. When you click Generate, DbSchema asks whether to drop the existing data first, and that write goes to Snowflake. Both editors are in the Pro edition.
Keeping the model and the Snowflake schema in step
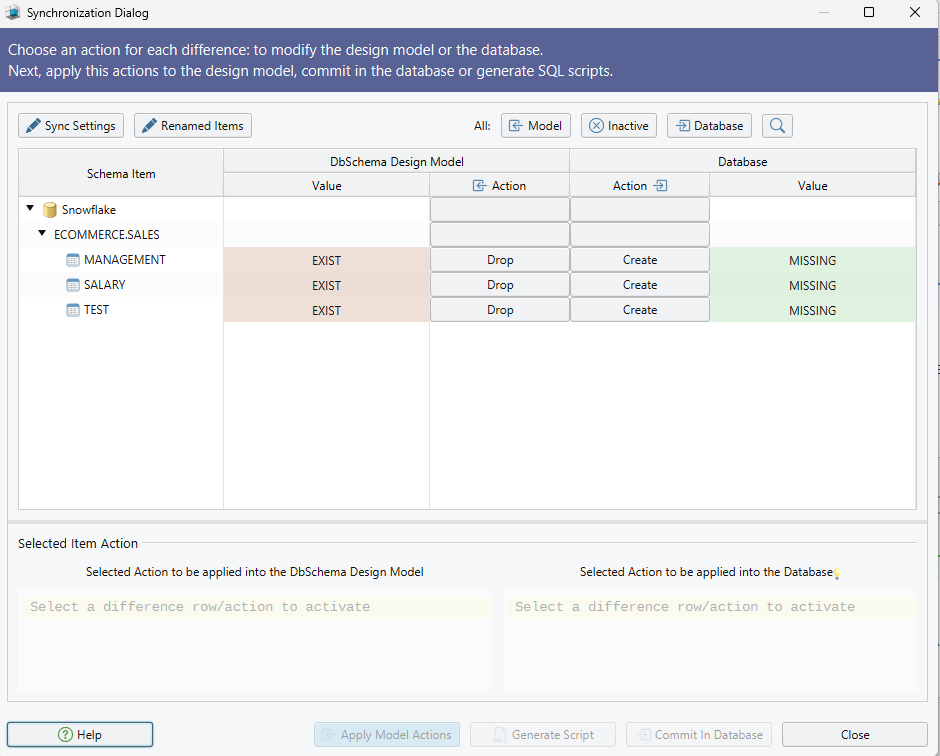
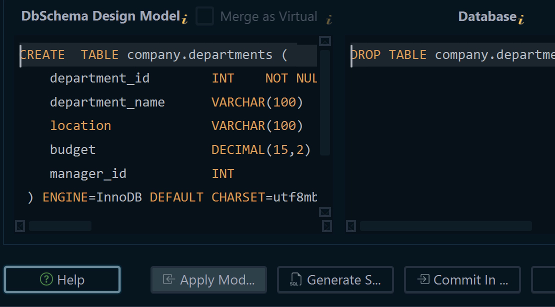
The model on your disk and the Snowflake schema drift apart as soon as someone deploys without you. Schema → Refresh Schema from Database pulls the current Snowflake state into the model and lists what differs: added, removed and modified tables, columns, indexes and foreign keys. Each difference is yours to settle on its own, by updating the model, pushing the change to Snowflake, or skipping it. Schema → Synchronize Model with Database goes the other way, generating the SQL migration statements that bring Snowflake in line with the model; the statements are editable before Execute runs them, and Execute is the click that changes the warehouse.
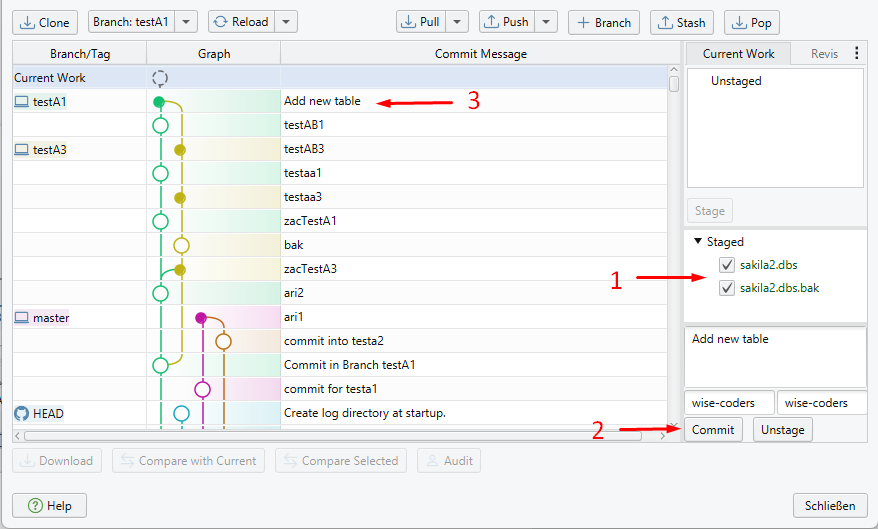
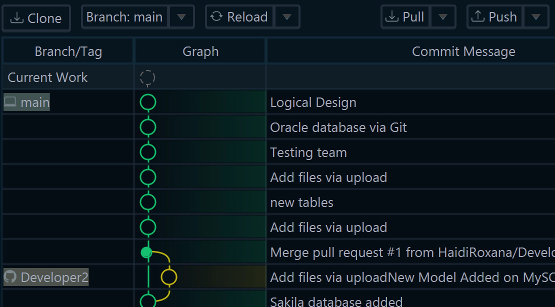
Because the design is one .dbs file in XML, it belongs in the repository that holds the code querying Snowflake. Model → Git — Collaborative Design opens the Git dialog, where Stage, Commit, Push and Pull are buttons, and Compare with Current opens the Synchronization Dialog on what a teammate's commit changed before any of it reaches the warehouse. Saving the model to a file and schema synchronization are both in the Pro edition.
Start with the diagram and the relations nobody declared, because that is the part of a Snowflake schema nothing else shows you. Download DbSchema at https://dbschema.com/download.html, connect with your account identifier, a warehouse and a role, and draw the missing lines yourself. The free Community Edition takes you as far as the diagram and the SQL editor. Everything the sections above put after that, the saved model file, the HTML5 documentation, the Query Builder, the Relational Data Editor, the Data Generator and schema synchronization, is Pro; the purchase page prices it under Business, Personal and Universities & Students.