Design and Manage MySQL Databases Visually with DbSchema
DbSchema lets you design, manage, and document MySQL databases. Create ER diagrams, define tables and columns, and generate SQL scripts - with or without a live database connection.
Use Git to share the design, compare it with the MySQL database, and deploy changes. DbSchema also includes a data editor, query builder, and HTML5 documentation - everything you need in one tool.

How to Connect to MySQL Database
Watch the step-by-step video tutorial below:
For written documentation, please continue reading...
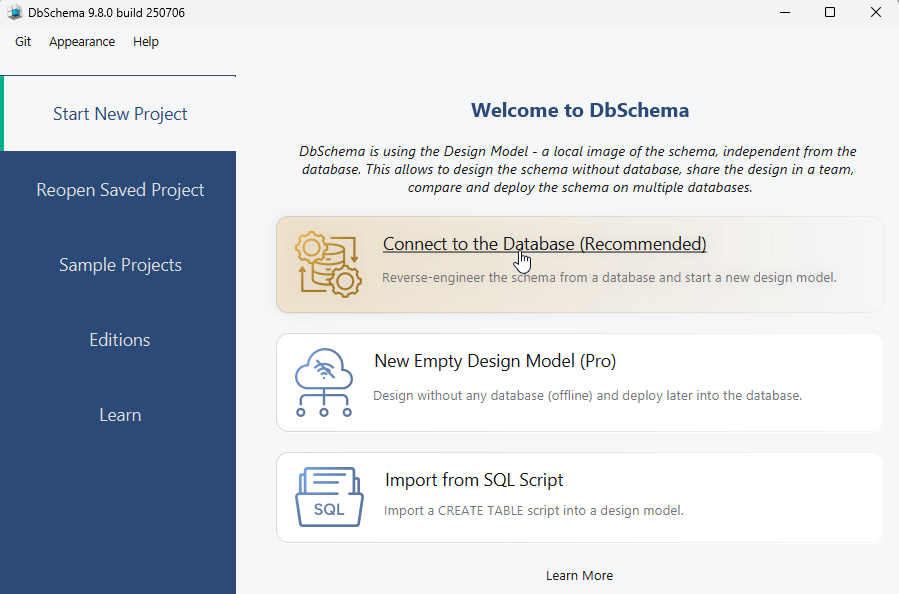
Open DbSchema, then click "Connect to Database" on the Main Screen and choose your database system. DbSchema will automatically download the required JDBC driver.
Preparing for Connection in DbSchema
Before starting the connection process in DbSchema, ensure the following conditions are met:
- The MySQL Server is running: Verify that the database server is operational and ready to accept incoming connections.
- Firewall Rules : Ensure that the firewall on the server permits traffic through port 3306, which is commonly used for remote connections.
I. Configure the Local Connection in DbSchema
- Select 'Standard' from the JDBC URL
- Connecting to MySQL requires entering the localhost port, along with the database username and password you configured during the MySQL server installation.
- Select the database you want to access, then click 'Connect'.

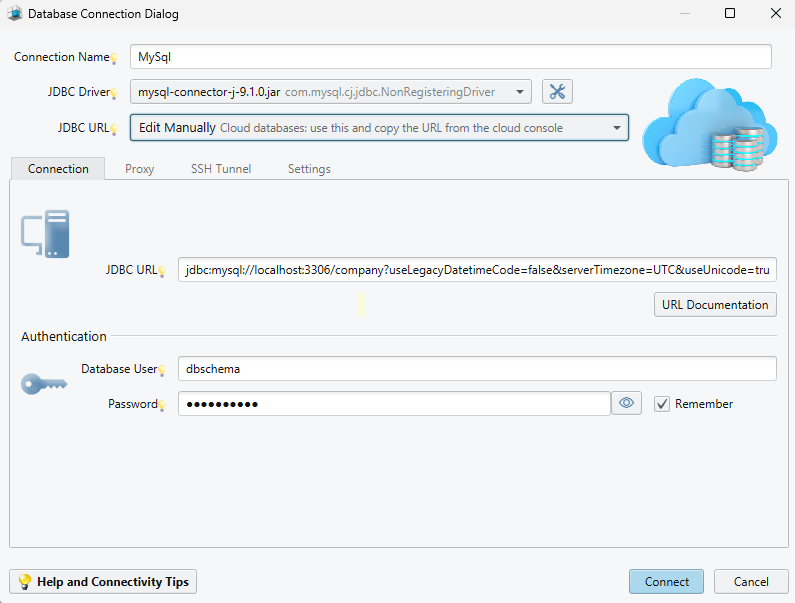
II. Configure the Cloud Connection in DbSchema
- Select 'Edit Manually' from the JDBC URL
- In DbSchema, you can manually edit the JDBC connection for MySQL, which is particularly useful for connecting to cloud databases.
- You can copy the connection URL from your cloud console and, if needed, adjust it to match your specific setup before testing the connection.
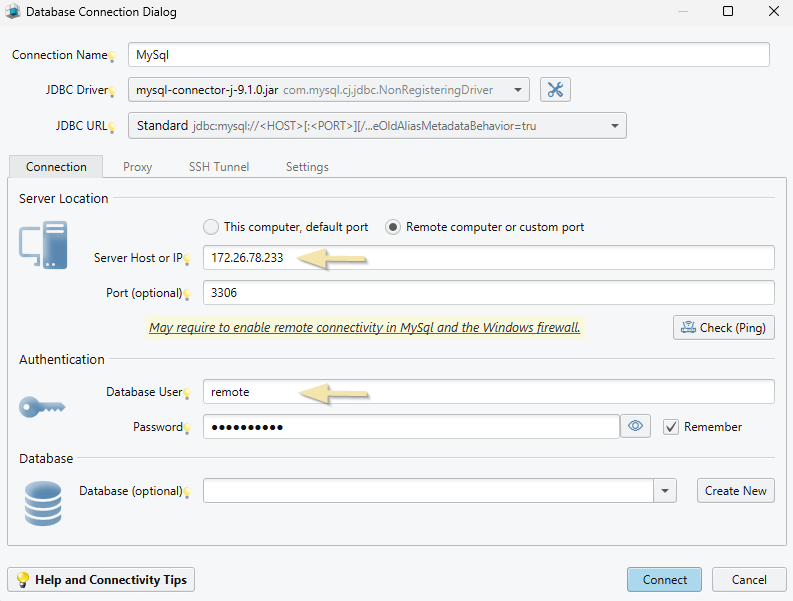
III. Configure the Remote Connection in DbSchema
For remote connections, everything starts with providing the correct combination of username and password.
- To allow remote connections, you need to enable TCP/IP connections in the MySQL configuration.
- Select the Remote computer or custom port
- Here, you can enter the IP address or the Hostname (Windows Computer Name) of your remote MySQL Server to connect from your local computer to another remote machine.
- Test the connection (Ping)
- Now, you have to create a new user that are allowed to connect from any host.
- Select the database you want to access, then click 'Connect'.
If you fail connecting you may need to check one of the items below.
- Read the Connection Dialog for more details.
- Start MySql Service - make sure MySql is up and running
- MySql User Names - are a combination of username and the host names allowed to connect.
- Enable Remote Connections - to be able to connect from another computer.
- Reset Password or Missing Privileges to Login - fix the missing login privileges or forgotten password.
- Allow MySql through Windows Firewall - Firewalls may block the connections.
- What to Check on the Common Error Messages - a list of error messages and how to fix them.
- Run MySql using Docker Container
- Guided MySql Installation on Windows
Introduction
Most of the commands in this article can be executed from MySql Command Line console. Start the console like this:- Open the command prompt by following this steps: Start -> run -> cmd -> press enter.
- Navigate to your MySql installation folder (Default: C:\Program Files\MySql\MySql Server 12\bin)
- Type in: mysql -u root -p
MySql User Names
MySql users are a combination of username and host name allowed to connect ( can be '%' for any host). Check the current users and hosts allowed to connect, execute this from the mysql command prompt:SELECT User, Host FROM mysql.user
+------+------------+
| User | Host |
+------+------------+
| root | localhost |
| user | % |
+------+------------+
Localhost means it can connect only from the same computer, while % means it can connect from any computer.
If MySql runs in a docker container the hosts are different ( like running on another computer ).
Enable MySql Service
If MySql service is not running, you won't be able to connect.Windows
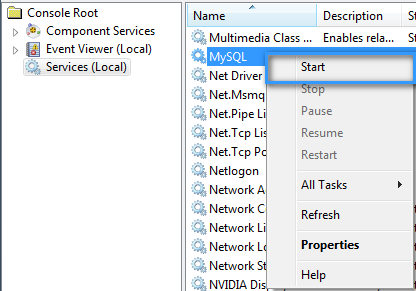
To enable MySql Service follow this steps:
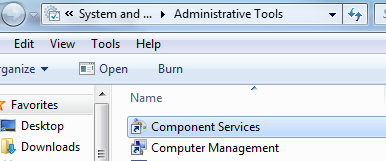
- Go to Start -> Control Panel -> System and Security -> Windows Tools -> Component Services
- Open Service Local
- Find your MySql service name setup during installation (For Example: MySql80)
- Right click on the service name and click start.
Linux
To start the MySql service on linux just type in the console: service mysqld start
Enable Remote Connectivity
Enabling remote connections require to enable TCP/IP connections in the configuration, and create a user allowed to connect from any host.Enable TCP/IP Connectivity From Remote Hosts
- To enable MySql to listen to remote connections, you need to edit your defaults file, located in C:\ProgramData\MySQL\MySQL Server
\my.ini (Windows) or /etc/my.cnf (Linux). - Edit the File: Open the file in a text editor and look for the following line:
bind-address = 127.0.0.1Modify the Line to allow connections from all IP addresses:
bind-address = 0.0.0.0Next, restart MySql service using
sudo /etc/init.d/mysql restart
Create a User Allowed to Connect from Remote Hosts
Check first which users are allowed to connect and from which hosts, using the querySELECT User, Host FROM mysql.userCreate a new user allowed to connect from any hosts. Use '%' for any host or use a specific host IP.
CREATE USER 'dbschema'@'%' IDENTIFIED BY 'password';
GRANT ALL PRIVILEGES ON *.* TO 'dbschema'@'%';
FLUSH PRIVILEGES;
By default MySql already has an user 'root'@'localhost', with a password you should have already set during installation. This will work only for connections from the same machine. Docker containers are like different machines. Connecting from DbSchema you should use a different user, like 'dbschema', with % for all hosts or the specific host IP.
Grant Privileges on Specific Tables
GRANT ALL PRIVILEGES ON *.* TO 'USERNAME'@'IP' IDENTIFIED BY 'PASSWORD';
FLUSH PRIVILEGES;
quit
The privileges can be allowed on a specifc table using <DatabaseName>.<TableName>
Reset Password or Missing Privileges to Login
If you forgot the database user password you can follow this steps and reset it :Windows
- Shut down MySql or MySql service: Go to Start -> run -> services.msc -> MySQL -> right click and select STOP
- Create a text file reset.txt. Im my case I save it under "C:\Temp\reset.txt". In this file paste the following lines:
- Open the command prompt and navigate to your MySQL or MySql bin directory inside the program folder ("C:\Program Files\MySQL\MySQL Server 5.0\bin" or "C:\Program Files\MySql\bin")
- Restart MySQL Service: Start -> run -> services.msc -> MySQL > right click and select START
UPDATE mysql.user SET Password=PASSWORD('EnterPassword') WHERE User='root';
FLUSH PRIVILEGES;
Replace "EnterPassword" with your new password. Also make sure that the UPDATE and FLUSH commands are on separate lines!enter the following command
mysqld.exe --init-file=C:\Temp\reset.txt --consoleThis will replace your root password with the one you have set in the text file. The command may hang as the daemon continues to run. You can stop it ( Ctrl-C ) and start MySql again from Windows Services.
Linux
- Log in as root and stop MySql service(daemon) by entering the command: service mysql stop
- Start MySql service(daemon) and skip the grant tables which store the passwords by entering the command: mysqld_safe --skip-grant-tables
- Now you should be able to connect to MySql without a password.Run the following commands:
- Log in as root and start the MySql daemon by entering the command: service mysqld start
mysql --user=root mysql
update user set Password=PASSWORD('new-password') where user='root';
flush privileges;
exit
SSL Connections
If you wish to use ssl encryption, append this '?useSSL=true&verifyServerCertificate=false' to the URL Pattern in the JDBC Driver Manager.Common Error Messages
Exception: Communications link failure.The last packet sent successfully to the server was 0 milliseconds ago. The driver has not received any packets from the server.- 1Check if the MySQL Service on Server is Started
- 2Check the MySQL server port and hostname
Test the connection using the PING button from the Connection Dialog.
The default MySql port is 3306. However, this port can be changed for each MySQL instance.
Check the server files my.ini or my.cnf, in the mysqld section, to see the configured port, for example, port=3306.
Find out the computer name right clicking My Computer and selecting Properties
- 3Disable Firewalls on Server and Client
Firewalls on client or server may block the connections. Configure them to accept incoming connections for MySql port or disable them.
- 4Check the JDBC Driver Version
DbSchema includes one JDBC driver for MySql. If the driver is not an actual version,
search the internet for 'download mysql driver' or look on http://dev.mysql.com/downloads/connector/j/
You will probably download a file mysql-connector-java-x.x.x.zip.
Decompress it and look for a file mysql-connector-java-x.x.x.jar. Upload this file in the in DbSchema JDBC Driver Manager.
- 1
If the bind_address values is set to 127.0.0.1 in the MySQL configuration file,
the MySQL server will not accept connections from remote hosts.
The bind_address line in the MySQL configuration file (my.ini or my.cnf) can either be removed or commented out to allow remote connections.
Run MySql as Docker Container
A short intro can be found here. Install docker then run from docker prompt:docker pull mysql/mysql-server:8.0
docker run --name=mysql -p 3306:3306 -e MYSQL_ROOT_PASSWORD=123456 -d mysql/mysql-server:8.0docker exec -it mysql mysql -uroot -pCREATE USER 'john'@'%' IDENTIFIED BY 'john';
GRANT ALL privileges ON *.* TO 'john'@'%';
FLUSH PRIVILEGES;docker stop mysql
docker rm mysql
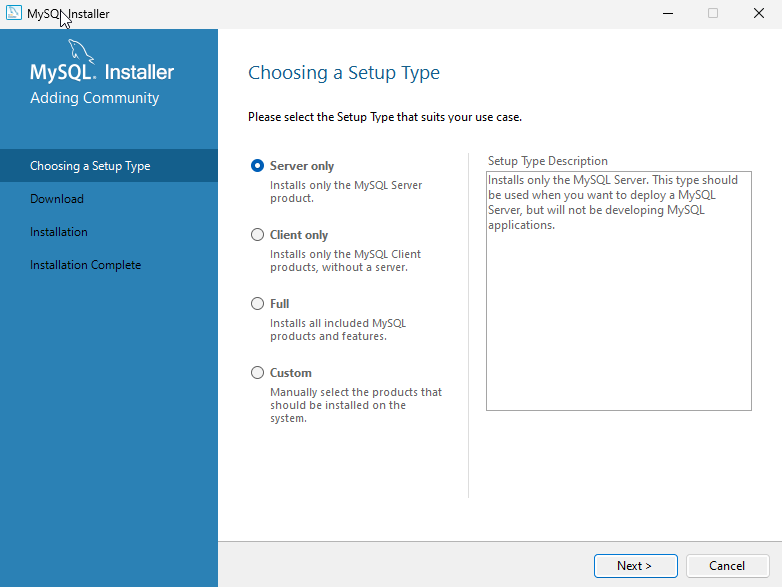
docker system pruneGuided MySql Installation on Windows
Download MySql from the official website
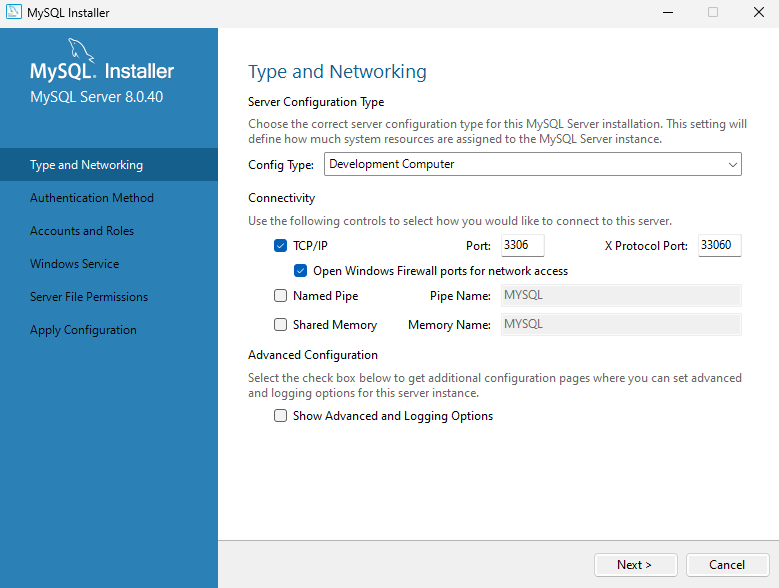
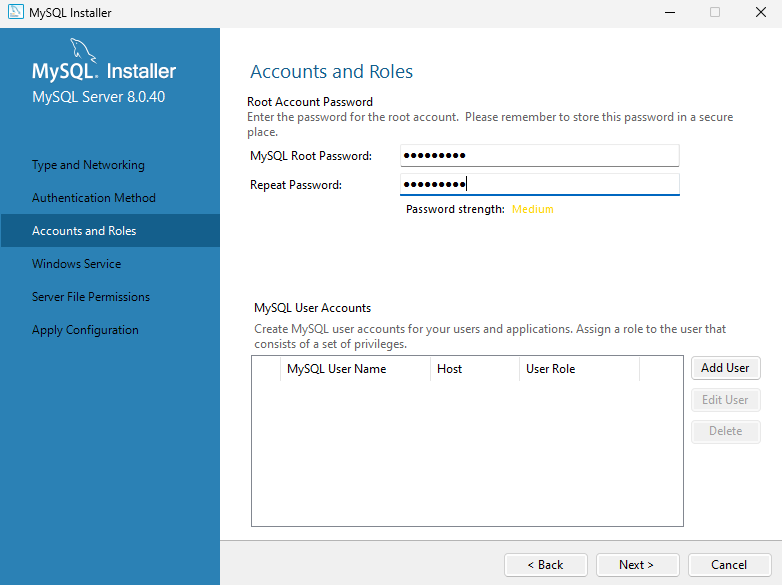
During the installation you have to enter the password for the database user root. Also you may want to enable access to MySql from remote computers
At this step set a firewall exception for MySql to allow remote computers to connect to MySql. The port number which is set here will be used also by DbSchema.
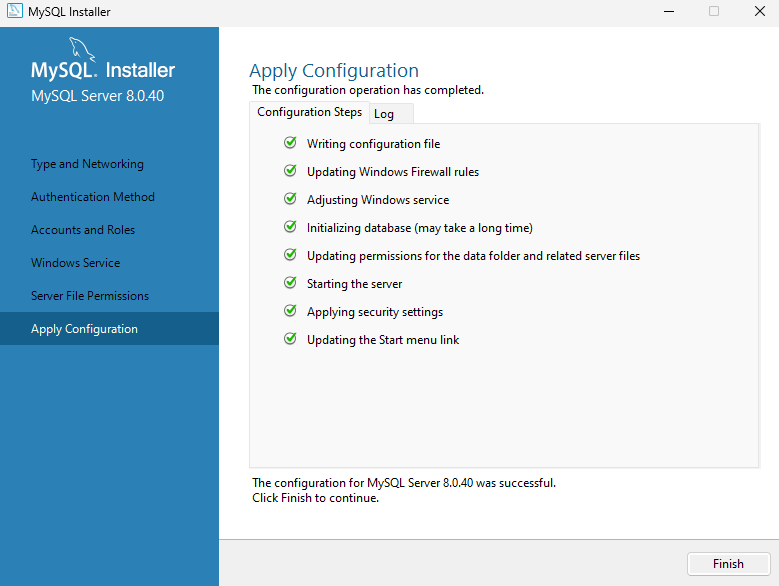
At this step you enter the root password and enable access to MySql database from remote computers :
After installation you can enable MySql to write all its executed SQL statements to a log file. For this edit the Program Files/MySql/data/my.cfg and add log=<file>
MySql Statements
- Create Database
mysql -U root -p
use <schema>;
show tables;
create database test;
drop database test;ALTER TABLE schema.table ENGINE=Myisam;