Design and Manage Snowflake Databases Visually with DbSchema
DbSchema lets you design, manage, and document Snowflake databases. Create ER diagrams, define tables and columns, and generate SQL scripts - with or without a live database connection.
Use Git to share the design, compare it with the Snowflake database, and deploy changes. DbSchema also includes a data editor, query builder, and HTML5 documentation - everything you need in one tool.

How to Connect to a Snowflake Database
Watch the step-by-step video tutorial below:
For written documentation, please continue reading...
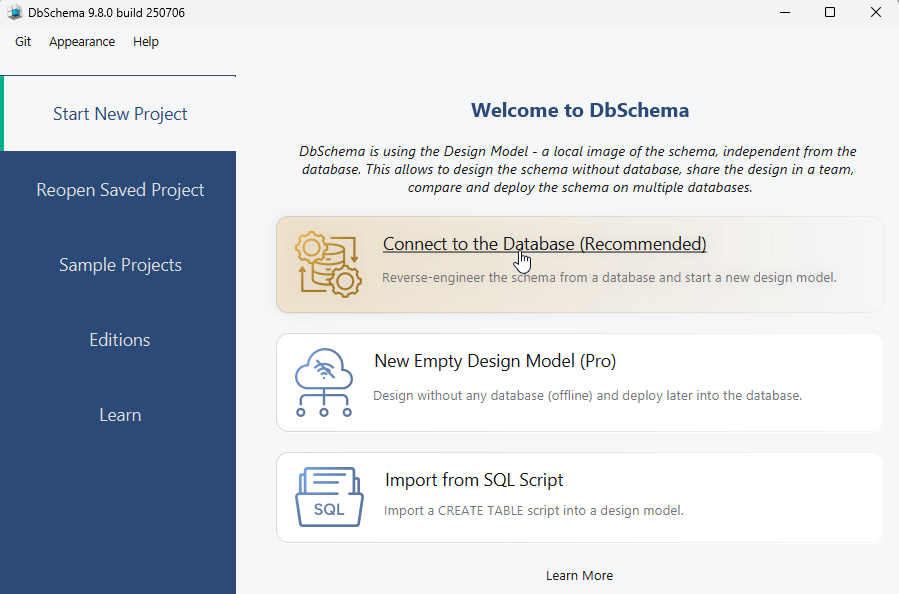
Open DbSchema, then click "Connect to Database" on the Main Screen and choose your database system. DbSchema will automatically download the required JDBC driver.
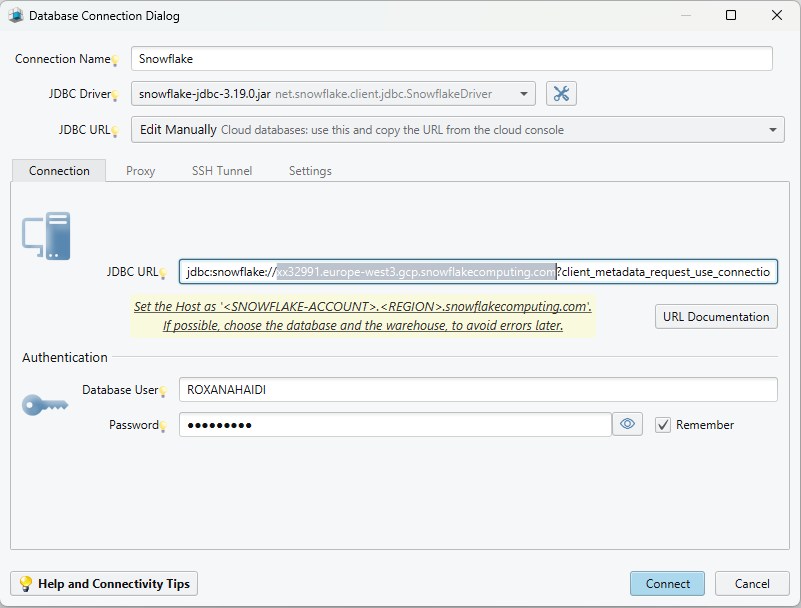
Configure the Remote Connection in DbSchema
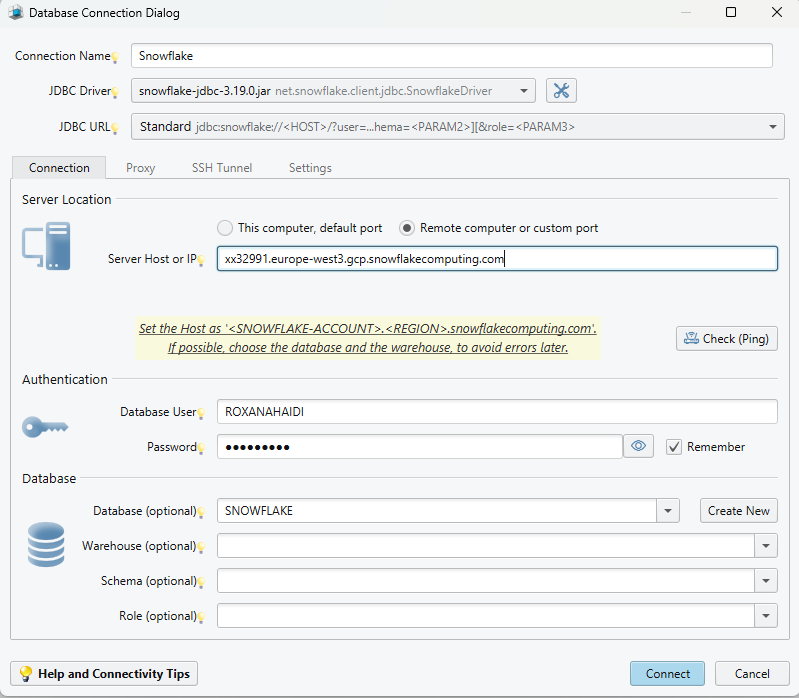
In DbSchema's connection dialog, you can choose "Standard" for a simplified setup, or "Edit Manually" to customize the JDBC URL.
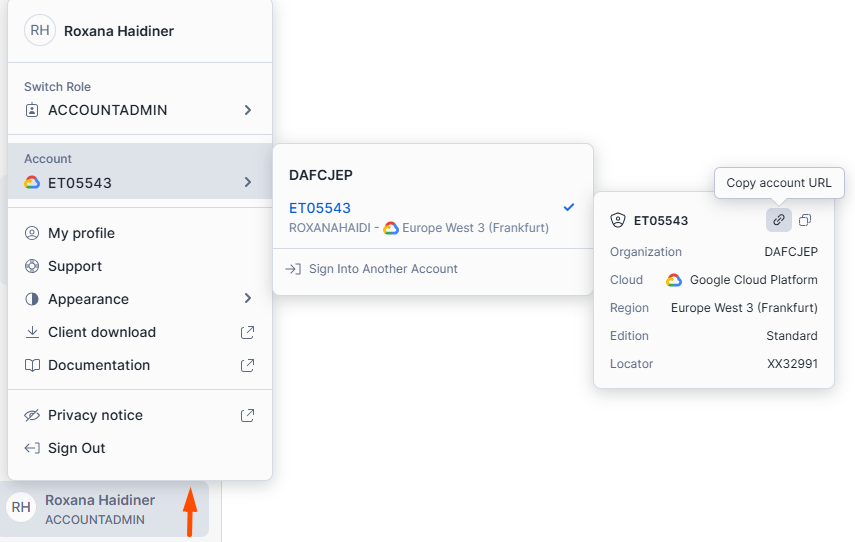
Step 1: Obtain Your Account URL
To connect DbSchema to your Snowflake database, begin by obtaining your account URL from the Snowflake Console , as shown below
Step 2: Configure the Connection in DbSchema
Option 1: Standard Connection
If you choose the "Standard" connection option:
- Copy your account URL from the Snowflake Console (e.g., https://xx32991.europe-west3.gcp.snowflakecomputing.com .
- Paste the URL into the "Server Host or IP" field in DbSchema, but remove the "https://" prefix.
- Enter your Snowflake username and password, then click "Connect."
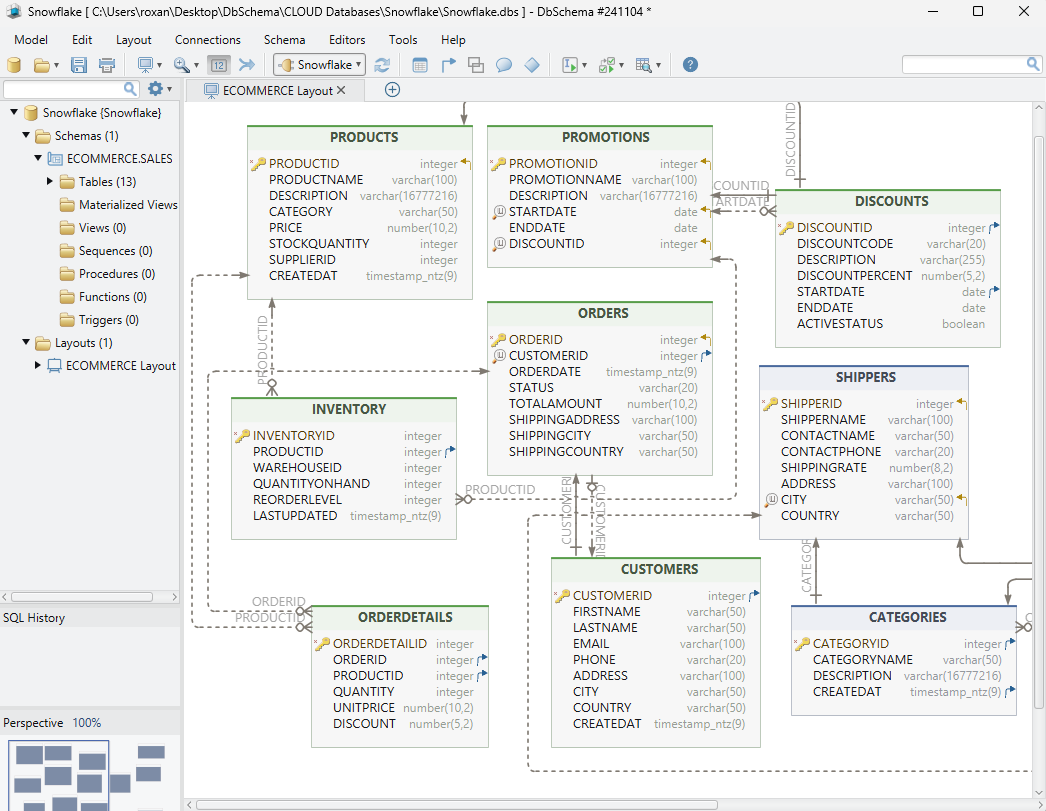
- Once connected, DbSchema will reverse-engineer your database schema, creating a visual layout of your tables and relationships.
Option 2: Edit Manually
- If you select "Edit Manually," enter the JDBC URL using this format:
- Replace your_account_URL with your Snowflake account URL. Next, enter your Snowflake username and password, and click "Connect."
- Once connected, DbSchema will reverse-engineer your database schema, creating a visual layout of your tables and relationships.
jdbc:snowflake:// your_account_URL ?client_metadata_request_use_connection_ctx=true
If you need more detailed connection information, read the Connection Dialog
Troubleshoot Firewall Issues
If you experience connection problems, check your firewall and antivirus settings, as they might be blocking the connection. More information on enabling Firewall Connections is available if needed.
 Note: Firewalls and antivirus software may block database connections.
If you encounter connection errors, enable logging for diagnostics by following the instructions here.