MySQL Database Designer: ER Diagrams, Schema Design, and SQL
DbSchema gives MySQL teams a design-first workflow: import the existing schema as an interactive ER diagram, refine it visually, and ship every change as a reviewed SQL script.
Built for fast schema design, query iteration, and safe MySQL-compatible deployments, with an offline model you can keep in Git, team collaboration, and documentation that developers, analysts, and stakeholders can navigate in minutes.

Download DbSchema See MySQL Features Download MySQL JDBC Driver · All drivers
What happens after you download?
Get to your first MySQL schema diagram in minutes. No account, no credit card.
Install in minutes
Download the installer for Windows, macOS, or Linux and launch DbSchema. No signup required.
Connect to MySQL or open a sample
Reverse engineer an existing MySQL database or open a sample model to explore tables, relationships, and indexes.
Design, document, and deploy
Edit schema visually, generate documentation, and prepare reviewed migration scripts for safer releases.
A Visual MySQL GUI for Windows, macOS, and Linux
MySQL powers more web applications than any other relational database — from WordPress installations to high-traffic e-commerce platforms. As schemas scale and teams grow, managing table structures, foreign keys, and indexes through raw SQL scripts becomes fragile. DbSchema is a MySQL GUI client that reverse-engineers your schema into an interactive ER diagram, giving every member of the team a shared visual model that reflects the current state of the database — on Windows, macOS, and Linux.
The free Community edition covers everyday MySQL client work: reverse engineer the schema, design tables visually on the diagram, and run queries in the SQL editor. Pro adds the offline design model with Git versioning, schema synchronization, and interactive HTML documentation — a 15-day Pro trial is included in the same download.
Download DbSchema Free See MySQL Features
Watch: connecting to MySQL and designing the schema in DbSchema (5 min).
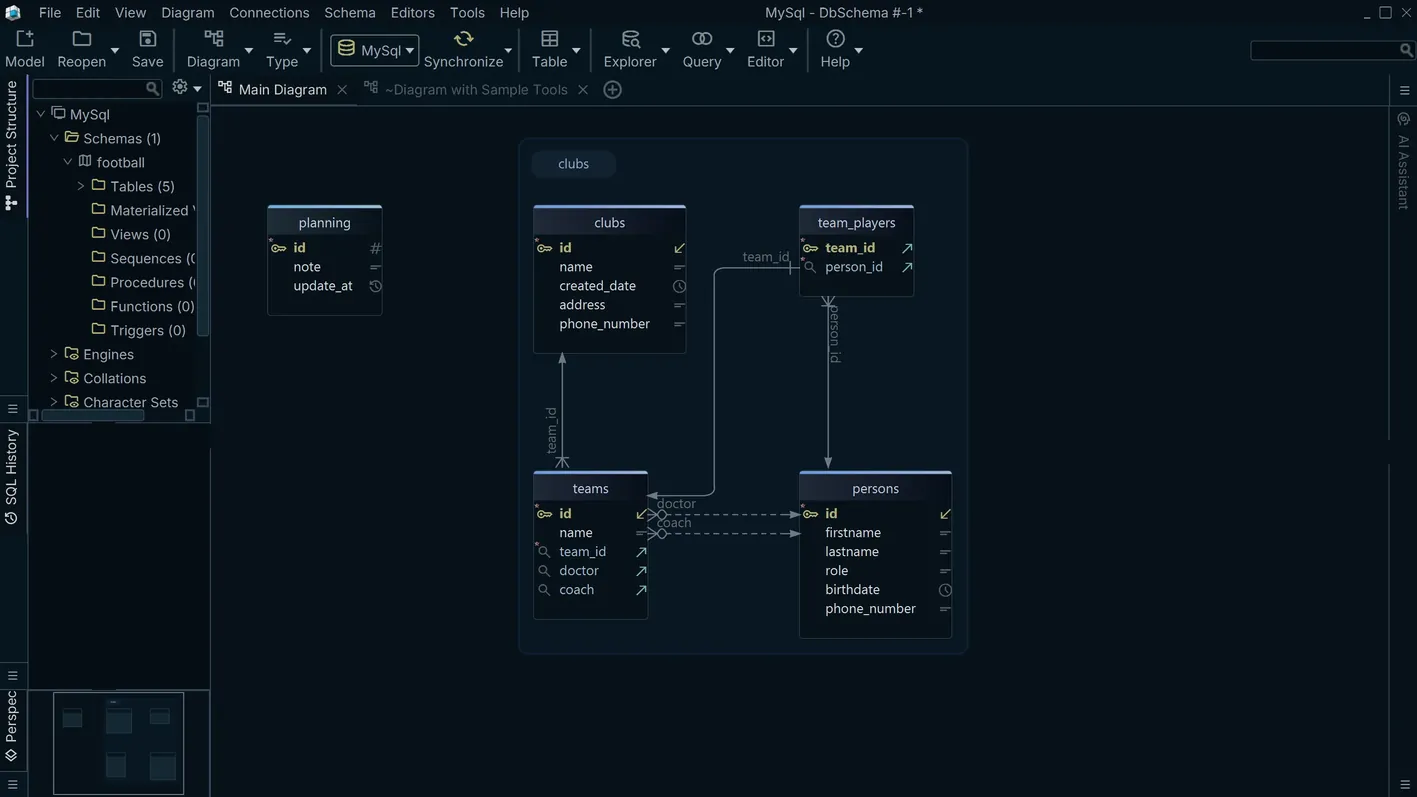
MySQL ER Diagrams with Drag-and-Drop Editing
Connect to a MySQL instance and DbSchema discovers all tables, relationships, indexes, and constraints automatically. Arrange the diagram to match your domain model, split a large schema into focused layouts, add new tables on the canvas, and draw foreign key links between them — DbSchema generates the corresponding DDL behind the scenes. See the step-by-step guide to creating MySQL ER diagrams.
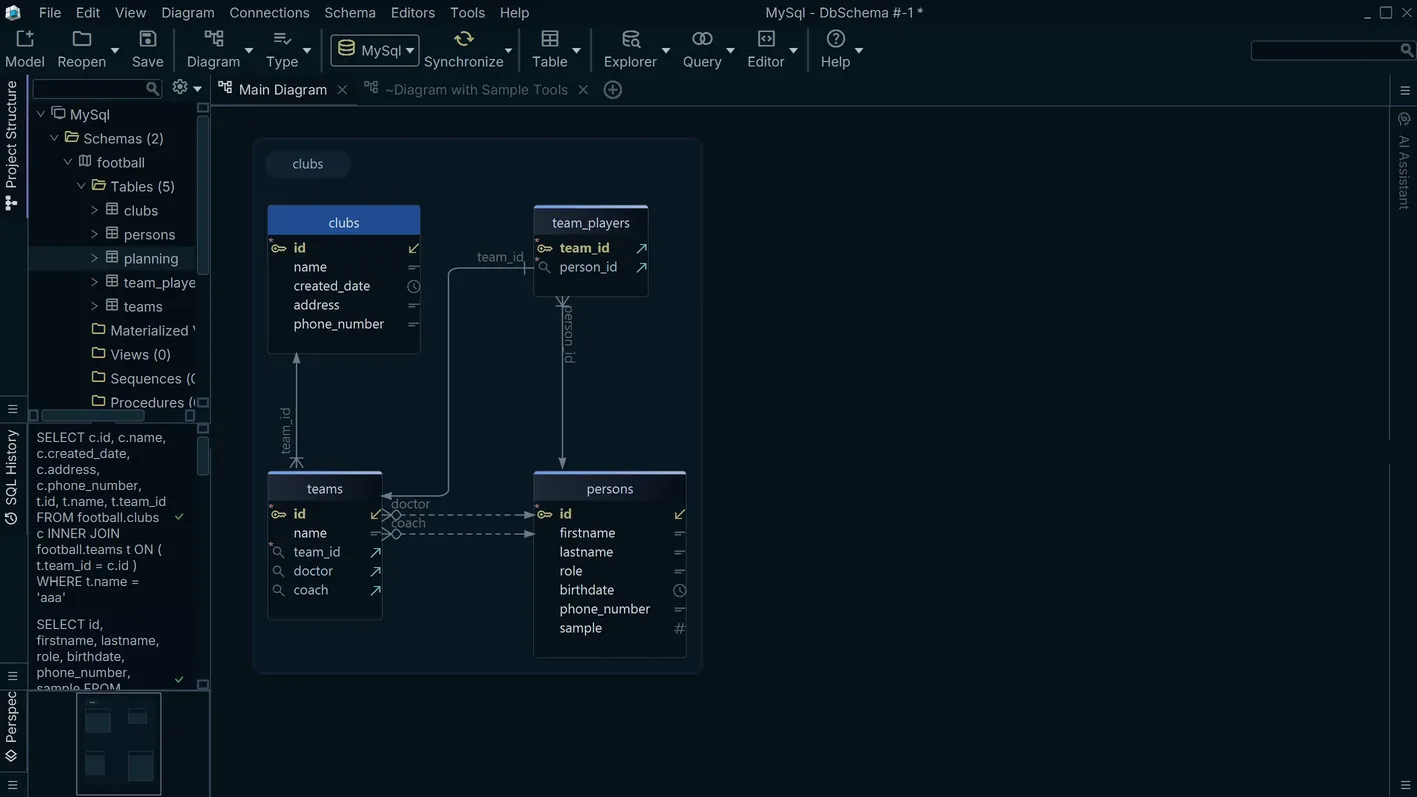
SQL Editor with MySQL-Aware Autocomplete
The integrated SQL editor provides schema-aware autocomplete for MySQL syntax — table names, column names, built-in functions, and keywords are suggested as you type. Execute queries against a live connection and inspect result sets in the same window without switching tools.
Schema Diff and Synchronization Across Environments
Applying schema changes consistently across development, staging, and production is one of the most error-prone steps in MySQL workflows. DbSchema compares two MySQL databases — or a saved model against a live instance — and produces the exact ALTER, CREATE, and DROP statements needed to close the gap. Review every change in the UI before executing.
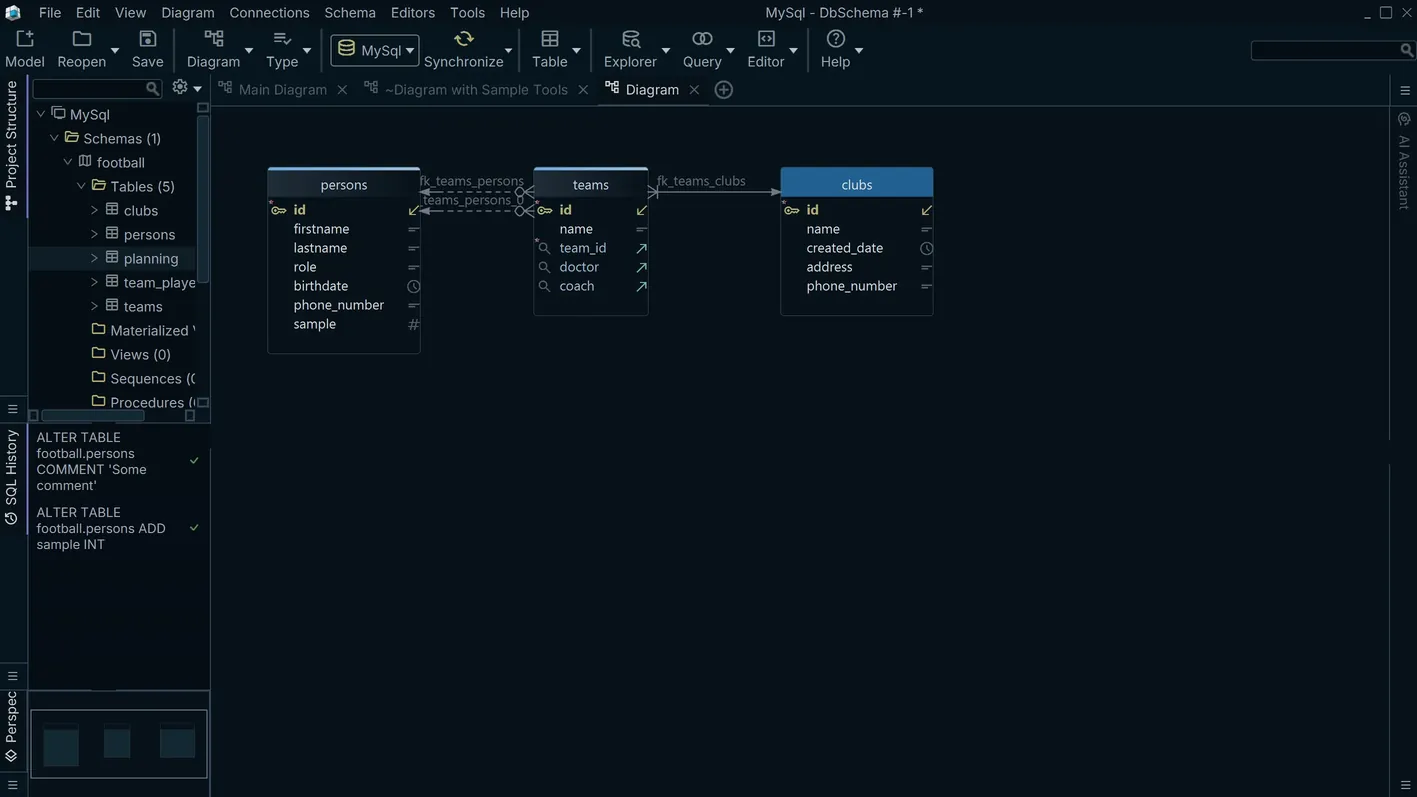
Schema Documentation and Git Versioning
The design model is saved as a project file that can be reviewed and versioned in Git alongside application code, so schema changes go through the same review process as any other change. From the same model, export interactive HTML5 documentation — searchable diagrams with table and column comments that analysts and new team members can browse without installing anything.
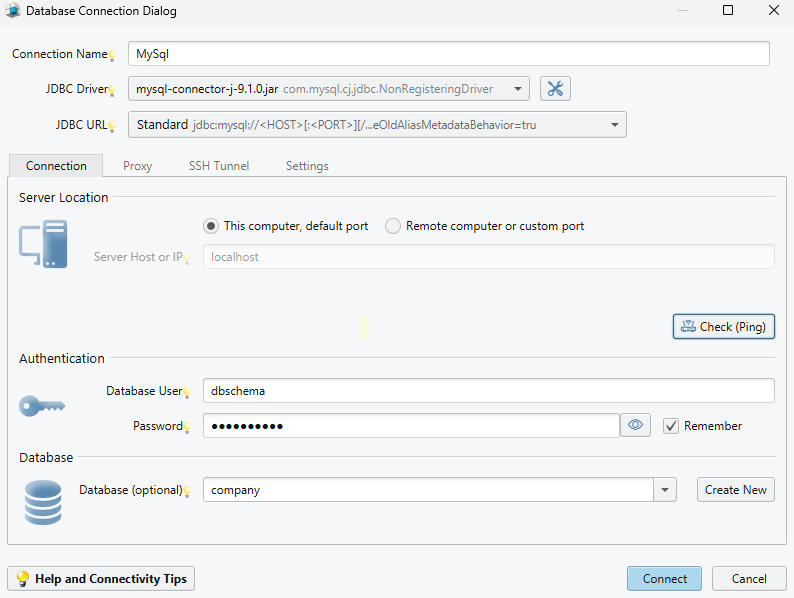
How to Connect DbSchema to MySQL
- Download and install DbSchema — no account or credit card required.
- Choose Connect to Database and select MySQL. DbSchema downloads the MySQL Connector/J JDBC driver automatically on first connect.
- Enter host, port (3306 by default), user, and password. The JDBC URL takes the
form
jdbc:mysql://host:3306/dbname. - Connect — DbSchema reverse-engineers the schema and builds the first ER diagram automatically.
For remote servers, confirm that MySQL listens on a non-loopback address (bind-address
in my.cnf) and that the database user has been granted access from the connecting host —
for example, GRANT ALL ON dbname.* TO 'user'@'app-host'; avoid '%' outside
development. To require TLS encryption with Connector/J 8.x, append ?sslMode=REQUIRED
to the JDBC URL. SSH tunnels are configured directly in the connection dialog. The same workflow
applies to MariaDB and
Amazon Aurora MySQL.
DbSchema vs MySQL Workbench
MySQL Workbench is Oracle's official, free tool for MySQL and a solid choice for server administration. DbSchema focuses on the schema design side of the workflow and is not limited to a single database engine. In short: administer the MySQL server with Workbench; design, document, and version the schema with DbSchema — many teams use both.
| DbSchema | MySQL Workbench | |
|---|---|---|
| Supported databases | 100+ — MySQL, MariaDB, PostgreSQL, SQL Server, MongoDB, Snowflake, and more | MySQL |
| ER diagrams and visual schema design | Yes, with multiple layouts per schema | Yes (EER diagrams) |
| Offline design model versioned in Git | Yes — model file with built-in Git integration (Pro) | Model file is not designed for diff-based review |
| Schema compare and migration scripts | Compare any two databases or model versions and generate reviewed migration SQL (Pro) | Model–database synchronization |
| Interactive HTML documentation | Searchable HTML5 diagrams with comments (Pro) | DBDoc reports |
| Visual query builder | Yes (Pro) | — |
| Test data generator and data importer | Yes (Pro) | — |
| MySQL server administration | — (schema design focus) | Yes — users, backup, performance dashboards |
| Price | Free Community edition; paid Pro with 15-day trial | Free |
Comparison based on typical usage of MySQL Workbench 8.x; both tools evolve — check the official documentation for current capabilities.
Why Use DbSchema with MySQL
- Reverse-engineer any existing MySQL schema into a browsable ER diagram in seconds.
- Design schema changes in an offline model and apply them to the live database when ready.
- Produce ALTER migration scripts by diffing any two MySQL environments without manual comparison.
- Browse and filter table data through the visual data explorer — no ad-hoc SELECT queries needed.
- Export complete schema documentation as a shareable HTML report for architecture reviews.
- Use one tool and one workflow for MySQL, MariaDB, PostgreSQL, and every other database you run.
Ready for a clearer MySQL workflow? Download DbSchema for free — connect to your database and get the first ER diagram in minutes, no signup required.
Tutorials and guides
Frequently asked questions
Related databases
Teams working with MySQL often use these engines too. Explore dedicated guides and JDBC setup for each.